
How to create your own brand photography

Alexa, activate broken record….. ‘a logo is not a brand.’
A brand identity is a collection of assets that work together to emulate a personality and a feeling, creating trust and consistency with your audience. Believe it or not, your photography is a crucial piece of the brand identity puzzle.
One way that you may be able to wrap your head around this concept is by thinking of some of your favorite brand’s instagram profiles — they likely feel cohesive, with familiar color tones, content, lighting, and graphics. So how do you find your brand’s photography style and use it to add to your toolbelt of brand assets?
1. Establish brand guidelines
If you already have brand guidelines established, yay! You are at a great starting point. Maybe you are thinking ‘what are brand guidelines?’ that’s totally fine too. We recommend reading this article as well!
Having established brand guidelines is helpful when thinking about branded photography because you will want your photos to feel cohesive with your other assets. For example, if your brand’s color palette is super warm and full of yellows, oranges, and reds, your photos should contain similar tones. If all of the marks in your brand contain clean lines and minimal (no frills) kind of content, you wouldn’t want your photography to be cluttered with props or distractions. Think of your photography as an extension of the rest of your assets, and the goal is for all of them to work together.
2. Create a moodboard
Once you have established your brand assets (marks, colors, typefaces, etc), it’s time to create a moodboard of photos you like and fit within your brand. One way to accomplish this is to create a pinterest board, but you can always save out simple screenshots and put them inside of a google doc, if that’s more your style!
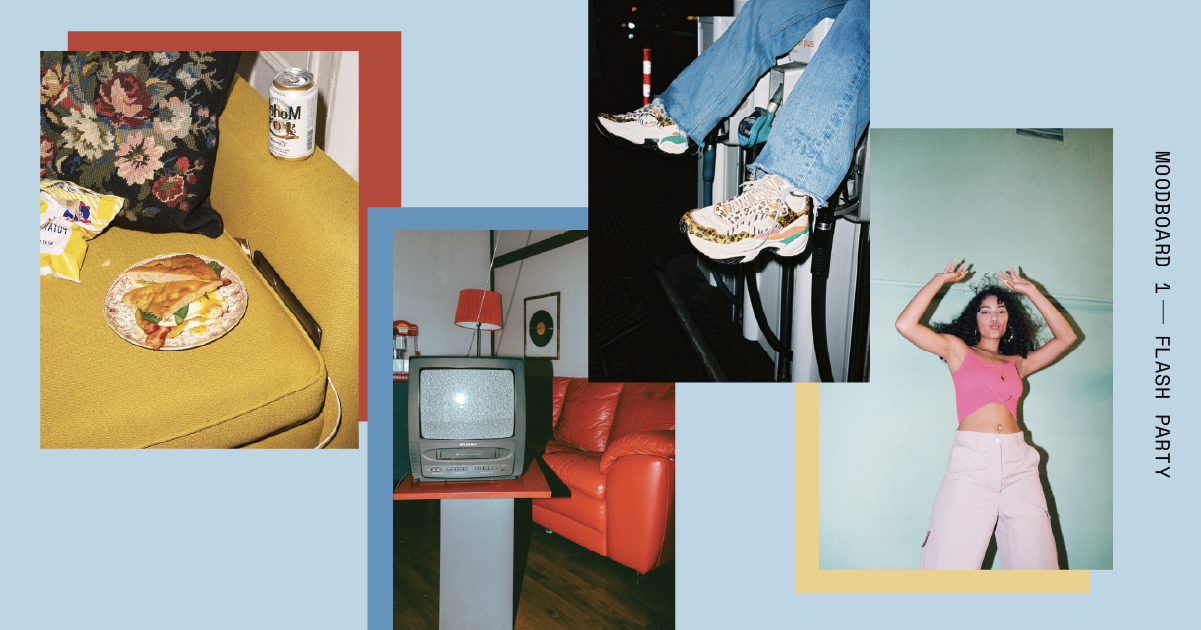
What is really important is that you pay close attention to the lighting style, color tones, props, and even the demographics of the subjects in your photos — they should match your brand’s target audience (and be mindful of inclusivity). This step is crucial because when it comes to brand identity, consistency builds trust. If your audience is used to seeing outdoorsy photos with natural light (think rei or patagonia), and all of a sudden they get hit with a staged photo with neon lights they may feel confused, or to be super dramatic, betrayed.
Check out these quick example moodboards we put together. Think about what kinds of brands they may be applicable to, and how each set contains similar tones, lighting, and complimentary content.


3. Prepare for a shoot
Even if photography is not your jam, having clear directions and guidelines can help your photographer (and help you feel satisfied with the results of your photography investment). One way in which you can prepare is printing out your moodboard, or sending it to your photographer. Chances are that they will ask you if you have any inspiration or vision for the shoot, and you can feel prepared by already having that checked off your list.
Another crucial step includes creating a shot list. Your photographer should be capable of helping you here, but once again, in order to get all of the content you plan to use, it is super helpful to make a list of all of the shots you need.
Get specific here and think about all of the different scenarios you may need to use these photos (think social media, website, ads, etc.) for example if you want to use the photos on a billboard, you may want a solid background and the photo be in landscape orientation. Don’t stress and think you need to become a fortune teller to know every single photo you will want, but planning will definitely help your photos be responsive and adaptive to different scenarios.
Lastly, think about any props, backgrounds, models, or products you may need for the shoot. Look to your moodboard for help here and with your shot list.
4. Photoshoot day
Yay, the day is here! Have fun and rest easy knowing you diligently planned for this moment.
5. Post production
Brand consistency can’t stop here. Keep your initial moodboard handy if you are the one editing your images and make sure all of them feel consistent in tones and lighting. For some, this may mean using the same filter or photo preset every time. While this is a super helpful and ‘easy’ way to create consistency within your photos, these should be used lightly and sparingly. For example, adding a sepia filter at 100% to images shot with different lighting will likely not give you a desirable outcome (cringes in designer).
Once you have all of the editing and images finalized, keep them handy for all of your content needs! Use them as a background for an ad, layered with your brand marks and typography, put them on your website, social, the possibilities are endless. Need another eye on your brand, photography style, or need help getting started? Reach out for a complimentary consultation with our team.